
Casualty Care in the cold. Casualty management priorities, Formula 1 pit stop team approach; Hypothermia wraps/protection & heat loss prevention in the field:
- Dec 8, 2024
- 13 min read
Updated: Jun 15

Formula 1 pit stop hypothermia approach.
Heat loss / Cold needs to be managed from the outset.
It’s something most of us in the outdoor/expedition medical world have been doing for decades. It’s nothing new.
We do this by using group shelters / bothy bags and also other interventions. Good skills to have the wider team trained to do this in parallel at the very start of the very longstanding CABCDE approach.
It’s exactly why our ‘Check cards’ have been headed by a ‘Cold Card’ for many many years, to pre empt cold management as CABCDE is implemented.
‘As we drove out of our International Centre, for Remote Area Medicine™️ in Eryri, Snowdonia, last night, at the end of delivering a 2 day risk management and exped planning course, it was late, dark, biblical driving rain and high winds. The government red weather text warning was sounding loudly on the phone. The river was rising to meet the bridge.
A 93 mph gust of wind was recorded.
Head torches showed a group heading down off the hill. Drenched.
No doubt, they’d had a rewarding day, but for those having a less rewarding day, it’s firmly hypothermia weather. Wet, cold, wind chill, little shelter (take a group shelter - it’s one of the most fundamental ‘must have’s’ on the hill and there’d be an interesting discussion about duty of care if you didn’t take one. Day 1 week 1 outdoor competence for group leaders and expedition medics).’
Here’s a recent paper on the value of group shelters/bothy bags:
The micro climate generated in a group shelter in the paper saw a 15 degrees Celsius rise here over 15 minutes of CPR. Impressive for a low cost, low weight piece of kit.
Hypothermia is something the writer takes very seriously. In the UK, we are very familiar with very wet, windy, cold conditions. Perfect conditions for hypothermia. It’s the environment we spent most of our outdoor time in.
Many years ago, the writer was involved in a very extended duration mountain event in south wales, across terrain with little or no shelter. In winter. We were constantly soaked. Wind chill was high. The heat was sapped out. Energy levels were sapped. The event was ultimately called off after many many hours due to a missing participant from overseas (he was eventually found, having dumped his backpack and all his kit on the mountain and headed off the hills to a nearby village). The writer has vivid recollection of the classic ‘umbles’ - stumbles, fumbles, mumbles. Indicators of cold related performance impairment. As soon as the writer was able to stop, it was time to get down in a gore tex bivvy bag, sleeping bag and get some high calorie food on (while lying in the bivvy bag/sleeping bag combination). Insulation alone wasn’t enough. Onboarding calories was an essential part of the immediate personal admin to allow the body to generate heat.
It took 3 days to feel warm again.
Knowledge driven prevention is always key - nutrition, clothing, rest, shelter, environmental, individual factors and injury - and many other aspects are relevant. We cover these subjects on our environment specific courses but understanding how to deal with a casualty who has either become hypothermic or who may become hypothermic, should be understood and practiced before deployment.
The treatment needed by a casualty depends on their condition at the time, informed by observations, current good practice and monitoring from casualty surveys.
This article is limited specifically to hypothermia wraps and preventing casualties getting colder, rather than an all encompassing consideration of hypothermia and its treatment nuances. That should be covered in training.
For the wider subject of managing accidental hypothermia, see the WMS guidance:
There are some useful diagrams within:

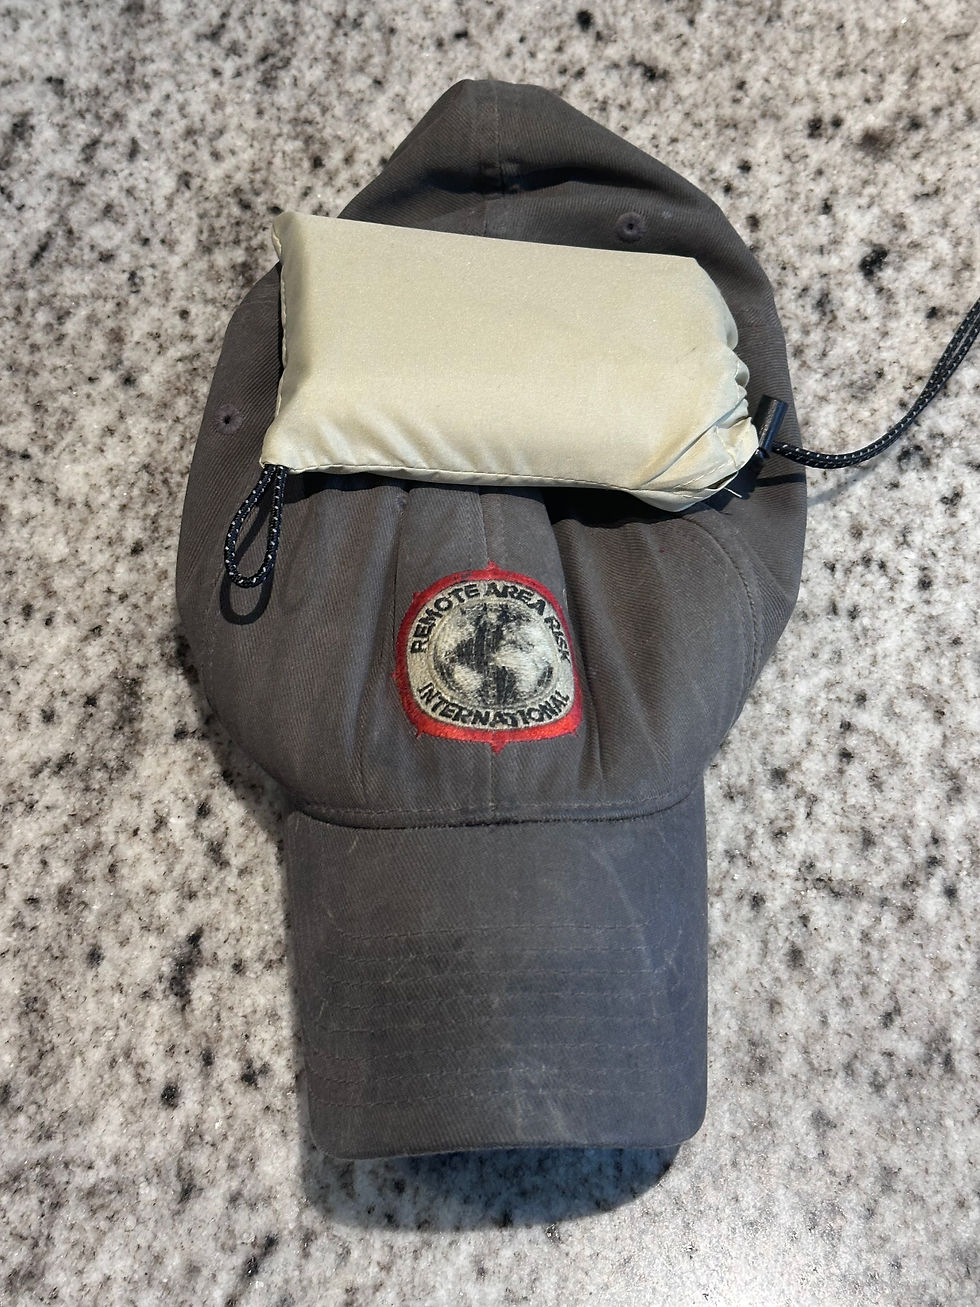
…including the ‘cold card’ which is issued on all our courses (our UK environment sees a lot of time spent in wet and cold with brisk wind).
The ‘Cold card’ is a useful aide memoire/reminder:


A useful summary of the guidance here:
The revised Swiss system:
Uses consciousness level as the primary element of field staging of accidental hypothermia. A practical tool - in the cold card, add AVPU respectively to the quadrants on the card.


The proposed introduction of ACVPU… adding in ‘confused’.

In Field, Formula 1 pit stop hypothermia wrap.
Train with your teams before deployment into the field so it’s slick and swift when needed. Basic. Fundamental.

Our remote area medical check cards are topped with a hypothermia cold card. It reminds alumni that in our outdoor context (outdoors, expeds, field work, NGO, SAR etc) that environmental protection has to be a very early priority (it doesn’t trump dealing the usual order - scene safety or catastrophic bleeding etc (or we’d have a well wrapped exanguinated casualty or injured responders) and usual order of priorities).
It reminds the cas carer that they should shout to the rest if the team to bring in hypothermia protection, in parallel to the cas carer assessing and treating the casualty.
This is common sense and also in line with calls for March to become MhARCH in appropriate environments:
Recently there have been other calls - for environmental protection to be considered in a ‘Critical’ phase prior to ABCDE - CrABCDE …
Of course, in the UK, we already have CABCDE to address cat bleeding and have done for many years.
We like the cold weather reminder cards and to train delegates so that keeping casualties warm is a parallel action. Get other team members being useful at an early stage. Putting protection in place is simple and any exped team member can initiate it while those with higher levels of skill or knowledge assess and treat the casualty.
The force multiplier comes in having environmental protection happening at the same time as the approach on scene. A team approach. Eminently doable including with youth groups as pre exped prep.
Research shows that the classic ‘burrito wrap’ , which is made up of kit that a backpack expedition team would have with them, trumps commercially available shrink wrapped hypothermia kits (*although some of which have been re vamped over recent years to include extra insulation and external warming components).

It’s important in your exped planning to consider multiple use equipment. As a foot and backpack dependent exped team, we’re not going to carry the extra weight of thermal blankets etc. but our team will have tents, sleeping bags, therm a rests, blizzard blankets, woolly hats, socks and spare clothes in dry bags, nalgene bottles and cookers. Or similar kit that plays the same role as fundamental elements of the expedition kit.
Process:
Medic approaches casualty. Assess scene safety and MOI.
A parallel call by the medic to team members to prep environmental protection.
Medic assesses/treats according to observations and need, in line with current good practice. In parallel;
Team members deploy group shelter over the medic and casualty and the casualty's thermarest under the casualty. Rain and wind protection. Instant micro climate starts to develop within the group shelter, with body warmth warming the air within the shelter. Combined with the insulation underneath the casualty, this reduces heat loss to the ground and air.
If you’ve got several in the group and it won’t compromise the rest of the group, place a second group shelter over the top. Cavity wall insulation.
The medic may be working on the casualty in that location for some time. Reducing heat loss as much as possible is crucial as evacuation may be some time.

Once those basics are in place, the wider team can start to put together a burrito wrap.
Group deploy blizzard bag or a tarp/tent flysheet/Jerven bag on to the ground (external weather protection) to waterproof the package, on top of that, a therma rest*, on top of that, the casualty’s sleeping bag, on top of that, a second blizzard blanket which will go directly next to the casualty (vapour barrier) . Inside the blizzard blanket, blue casualty pads (to absorb body output) and ready heat blanket.
An important point - align all the zips/openings on the same side, for ease of accessing the casualty for nursing care and removing damp nursing pads. This is why we like a second blizzard blanket with Velcro opening as the outer, waterproof layer, all inside an Xtract SR Stretcher so we don’t have to tie the bundle up with a rope. Easy access.
Pulse ox and thermometers with extensions so you can monitor these and other Obs from the outside of the package to minimise the need to open the packaging. Keep the warmth in, yet maintaining monitoring.
This ensures a waterproof packet (blizzard blanket or Jerven bag) with insulation from the ground (therma rest), insulation around the casualty (sleeping bag) and active heat (ready heat blanket).


Removing wet clothing or not ?
‘Rescuers should cut off saturated clothing in a protected environment before wrapping casualties, but damp clothing need not be removed. Because of the high peak temperatures recorded on the surfaces of CHBs, they should not be placed directly against skin, and compression straps should not be placed directly over CHBs.’
‘Active warning/ slow down heat loss.’:
Ready heat blanket (Chemical Heat Blanket) deployed on casualty (not next to skin)
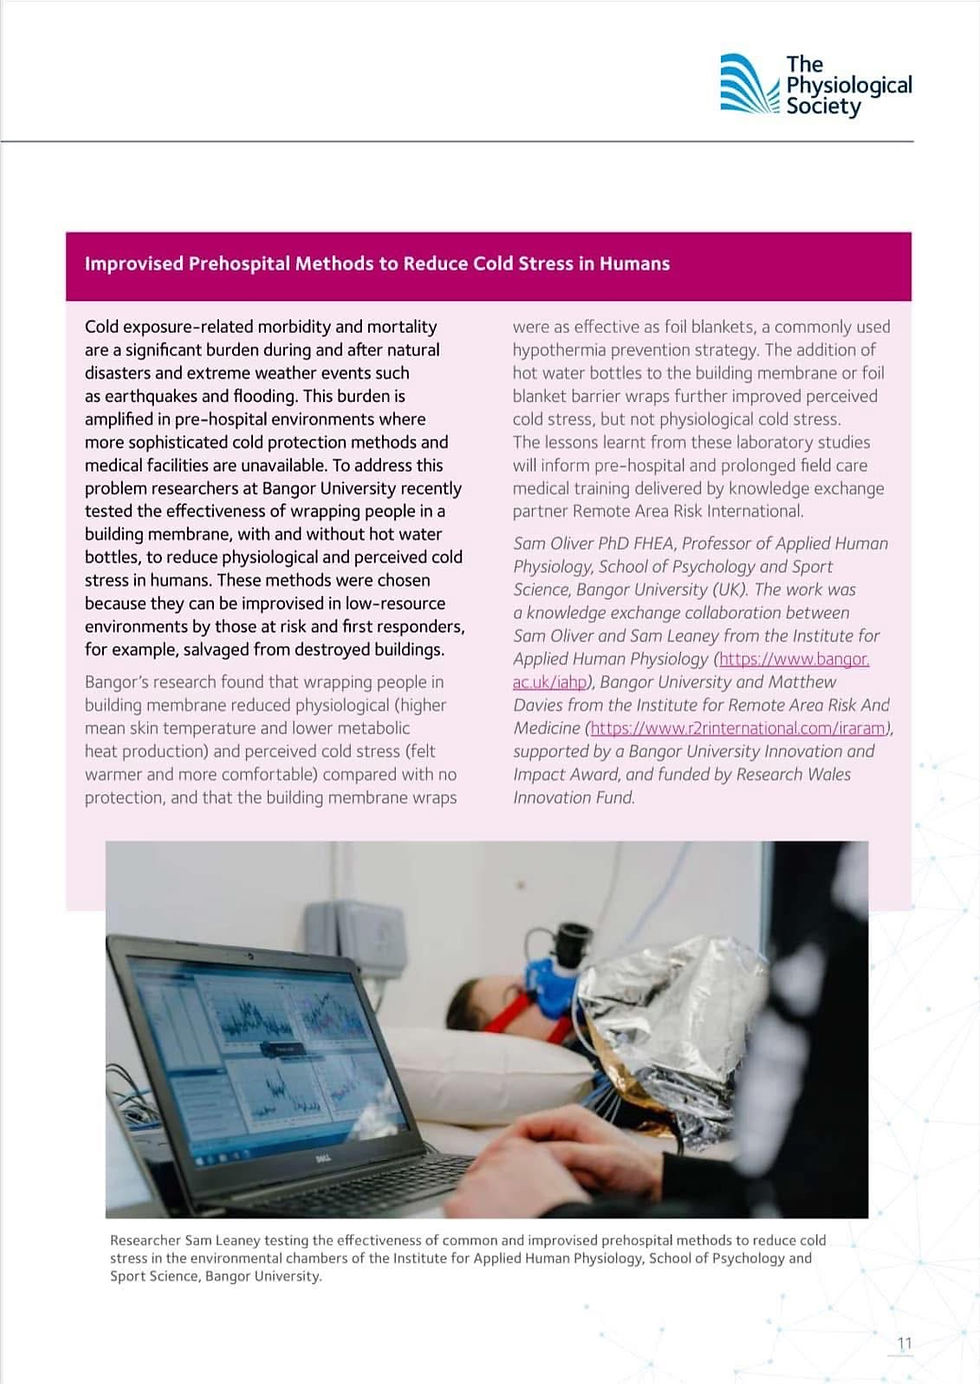
‘Active warming’ (to slow down heat loss) from a ready heat blanket or Nalgene bottles filled with hot water (then placed in a sock then a dry bag placed in the armpits and groin).
**See below for a summary of the results of research we did with the Institute for Human Physiology at Bangor University. The outcome included that Nalgene bottles filled with hot water made casualties feel warmer but didn’t actually warm them up. They improved perceived cold stress but didn’t improve physiological cold stress. It’s slows heat loss. It doesn’t warm them up.
Get calories in to the casualty.
(Over the intermediate/longer term, ultimately use/move to nearby shelter if available. We can generate extra heat to warm up the air by using cookers (be carbon monoxide aware), bottles of hot water, heated blankets etc. Even travel hair dryers if you’ve got power. On our Prolonged Field Care Courses, delegates will place a casualty on a camp bed, make a skirt from bin bags and gaffa tape this to the camp and the floor - to form a sealed 'void' under the camp bed. They will then use hair dryers to warm up the void under the camp bed.

So, there’s a vapour barrier next to the casualty and absorptive pads inside that (lots more on this in our long standing, tried and tested civilian Prolonged Field Care course).
The vapour barrier reduces heat loss from evaporation but also, importantly, keeps the insulation (sleeping bag) dry.
Vapour barriers:
‘The use of a vapor barrier as the innermost layer in combination with an active external heat source leads to higher mean skin rewarming rates in patients wearing wet clothing who are at risk of accidental hypothermia.’
Casualty is moved in to the package.
Hat on, gloves on, socks on:
Zip up their clothing. Keep the neck insulated to avoid heat loss from the large vessels in the neck.
The package is closed up, tied in place (ropes or even gaffa tape) then placed into a stretcher system if you have one - to either evacuate or move to shelter /out the wind. We recommend carrying an Xtract SR stretcher (we remove the base for backpack expeds) which we introduced to the remote area medical/exped sector in 2019. Great to see how so many organisations have recently followed suit.
It’s light, packs very small (vacuum pack it) and side it down the internal pocket at the rear of your pack.
You should know how to improvise but there’s no excuse not to go prepared.
We've been working with a leading University over the past 18 months - 2 years including on a variety of materials to use as vapour barriers, including breathable barriers.
Effectiveness of burrito wraps v lightweight commercial hypothermia kits*:
The sleeping bag insulates the casualty. The thermarest insulates the casualty from heat loss to the ground through conduction.
The external blizzard blanket keeps the whole package dry.
Monitoring and trends.
Pulse ox and thermometer with extensions so you can monitor these and other Obs from the outside of the package to minimise the need to open the packaging. Keep the warmth in, yet maintaining monitoring.
External condom type catheter with tubing to a bottle (external v Foley catheter discussion and pros v cons) discussed on our Prolonged Field Care course).

A blizzard blanket, tent fly sheet, Jerven bag or tarpaulin could be used for the outer wrap. You’ve got what you have. You don’t have what you don’t have. Make sure it’s something waterproof and wind proof as it’s the outer layer.
The group shelter that was deployed early over the casualty and medic. This kept the wind and rain off the casualty (and medic) and generates a micro climate with impressive speed. The casualty is breathing ‘less cold’ air.
We started using blizzard products in c. 2003. We’ve carried group shelters in our backpacks for decades.
If you’ve got more space/ability to carry more weight, look at the excellent TSG Associates Heat Saver or the excellent Rigloo.
In a recent cold weather test in the @rigloo (Tyrolean Alps in Oct 24 with an outside temp of zero degrees Celsius with three persons inside saw the temperature inside the Rigloo rise to 21 degrees celcius in 5 minutes, 27 degrees celcius in 15 minutes).
We’ve tested the Rigloo from the earliest prototype, providing input to the very forward thinking designer that it could be a great EMS shelter rather than the intended roadside, breakdown shelter. It’s now a great piece of EMS kit. Small back pack sized, lightweight, inflatable in 1 minute. Great way to generate a microclimate.


Using the remarkable mequ fluid warmer inside a Rigloo shelter. IV fluids went from 5 degrees Celsius to 35 degrees in seconds. Various improvised methods exist including running tubing through warm water and keeping fluids warm inside down jackets, warming IV fluid bags in a microwave, using jet boils to warm water, pour it into bladders, pack bladders around the fluid bag.
We can generate extra heat to warm up the air by using cookers (be carbon monoxide aware), bottles of hot water etc. Even travel hair dryers if you’ve got power. On our Prolonged Field Care course, we simulate the evacuation of casualties to higher echelons of care and this introduces (in late stages) electrical power becoming available in a building. This increases options.

Even in a building, run a cord above the casualty, suspend a group shelter from it to cover the casualty and med team. Have the casualty in a micro climate, warmed by all those inside it, to slow heat loss. They are then breathing in warmer air.
Photo - a skirt around the camp bed - made of bin bags and gaffa tape - with a hair dryer warming the sealed void under the bed.
*A note about insulating pads/thermarests. For years, adventure racers have used inflatable packaging as lightweight sleeping mattress/insulation - bubble wrap. We suspect this is where the idea of therm a rests came from.
There are super small, super light mattresses. We like the Klymit Recon V for hot weather. Slightly smaller than a Nalgene bottle. However, it has virtually no insulation value (R value/rating 1.3) . An insulated version, with an R value/rating of 4.4 ( v slightly larger than the uninsulated version), is available. Image below is the non insulated version;

Insulated version below - very slightly bigger.

Pillow from the same manufacturer;

Both mattresses are deep, light, small and incredibly comfortable.
Definitely worth their weight in your pack.
There are now commercial products coming on the market that are essentially long standing commercially available inflatable parcel packaging, following in the long tradition of adventure racers using packaging such as bubble wrap for sleeping mats (which is even used by some ambulance crews as insulation for casualties).
The packaging is easily inflatable and clever sticky tape one way valves ensure each tube is independent and stays inflated if other tubes are pierced.
It has obvious splinting potential too.
This packaging has been around for years (first saw it in Jan ‘23 when an Op Frankton 80 year commemorative bottle of rum landed in the post.
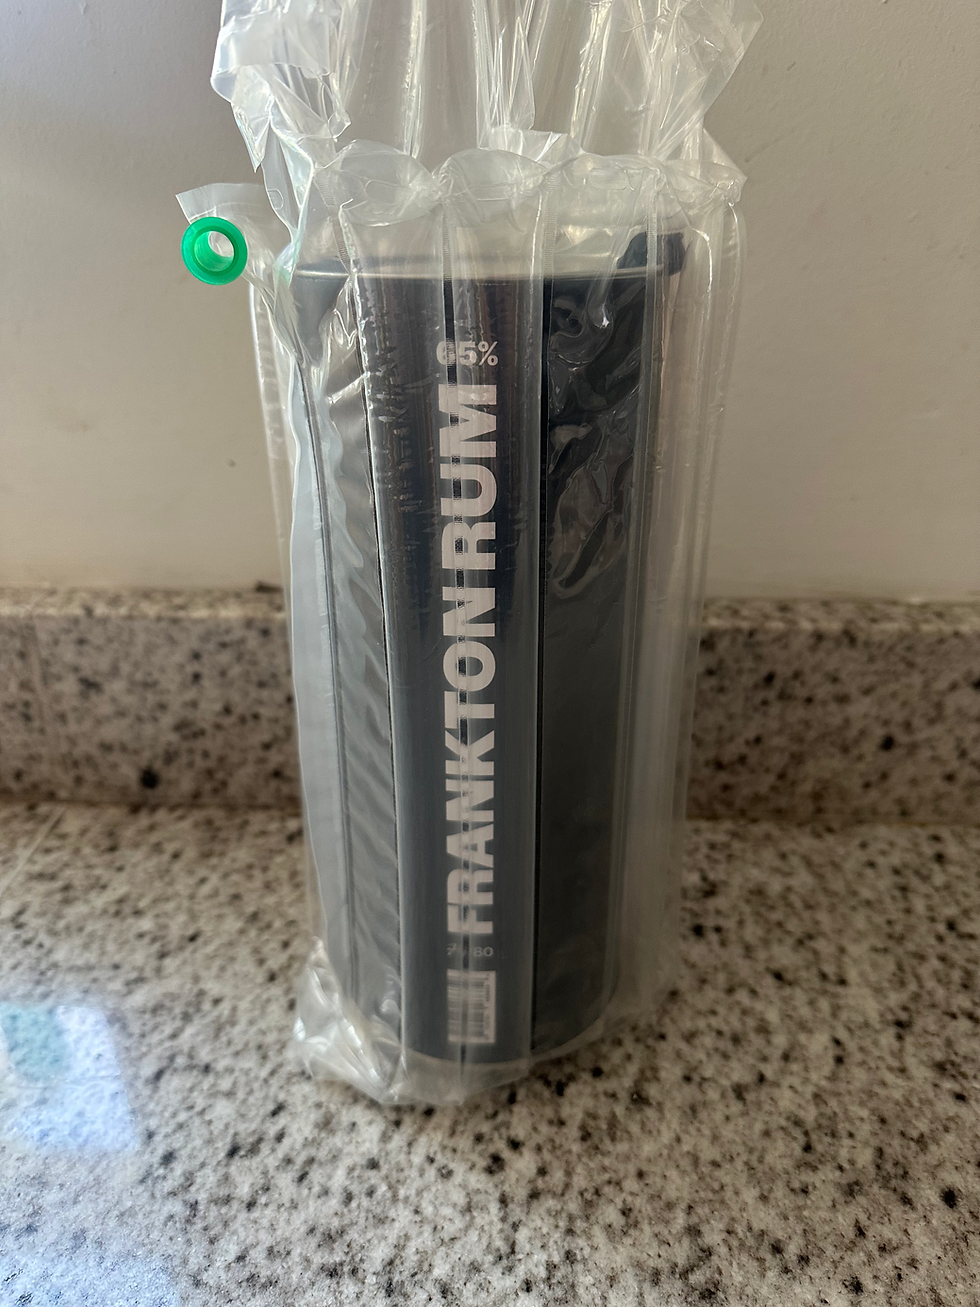
The packaging comes in long rolls and is super light weight. Super cheap when bought in a roll of Amazon. A good and very logical re tasking for mass casualty settings as insulation by way of mattress. It would be even better if widened to full therm a rest mattress size. It’s robust already but there are pierce proof plastics out there that could assist (we use pierce proof large plastic bags for transpiration bags in survival training). Good initiative and thought process by those advancing this improvised/ alternative use.
Will be interesting to see an R value given the very low R value of uninsulated sleeping mats. It will be better than nothing but probably more use as an air bed minimising pressure sores etc.
Multiple mattresses on top of each other could be useful. However, there comes a point where a small insulated inflatable mattress is likely to be more effective v weight. The value in these cheap, disposable inflatable packaging units is low cost/ high volume of units for multiple casualties.
It’s nothing new. It’s not a new invention .. but the alternative use could be argued to be an inventive step.
An even greater / more powerful inventive step could be to see eg Blizzard Systems incorporate these layers inside a blizzard bag or blizzard blanket. The inflatable layers are ultra thin and would add little extra weight or bulk… but would include an inflatable insulation cocoon inside, still accessible by the centre strip on a blizzard blanket as it would see one inflatable layer on the top and one at the bottom (both inside the blizzard system material though).
We’ve discussed this with the distributor of the commercially marketed inflatable packaging.
Not sure what the commercial costs of the inflatable mattresses would be as they haven’t been commercially launched yet as of this 18 May 25 update to this article - so we’re not sure if it’s just re packaged as is or has been upgraded in some way.
Pic - commercial packaging re purposed as a super lightweight hypothermia wrap. Works out circa £1.50 per mattress.

Ultimately, making wise choices in expedition team prep (ie all having the insulated Klymit sleeping mats, Nalgene bottles for urine output monitoring and improvised field warming techniques and inflatable pillows to keep the casualty head raised, fords kit that is better than anything that is improvised and ultimately extra weight over and above what you’d be carrying anyway.
IMPORTANCE OF ONBOARDING CALORIES:
Importantly, get calories into the casualty via a route safe to do so. The casualty needs energy to shiver to generate heat. Calories allow the casualty to shiver and re start the warming process. The casualty, if hypothermic over a long hike etc, is likely to be have an empty tank, energy wise. Get calories back into them to fire up heat generation.


Get the basics right, every time.
**A paper will follow in due course showing the outcome of our latest research in environmental chambers as part of our partnership between the Institute for Remote Area Risk And Medicine and the Institute for Human Physiology at Bangor University.

Here is a short summary:
ll the above subjects and more are taught on our medical courses.
7 day Remote Medical Responder: A Wilderness First Responder Course™️ for non healthcare professionals.

4 day R/EMO:TE Medic Foundation course (part of the wider 15 day, c 380 hour R/EMO:TE Medic Programme preparing health care professionals to operate as Remote Area Medics.

2 day Prolonged Field Care course for all levels.

Prevent | Respond | Rescue | Resolve ™️
Remote Area Risk International : ‘Where Professionals Come To Train’ ™️
Comments